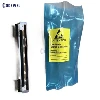
How to change the print head of our common 8018TTO thermal transfer printer?
First of all, the printer power must be turned off when replacing the print head. In fact, when replacing a new print head, be sure to implement anti-static precautions.
So, how to remove the damaged print head?
Step 1 of removing the print head of the thermal transfer printer
1. Remove the four stop screws from the printed circuit board clamps of the thermal transfer printer.
Step 2 of removing the print head of the thermal transfer printer
2. Remove the clamp and set it aside.
Step 3 of removing the print head of the thermal transfer printer
3. Push the black part forward to loosen the print head ribbon fastening connector.
Step 4 of removing the print head of the thermal transfer printer
4. Remove the coding ribbon on the print head from the printed circuit board of the thermal transfer printer.
Step 5 of removing the print head of the thermal transfer printer
5. Loosen the print head quick release screw.
Step 6 of removing the print head of the thermal transfer printer
6. Push the print head back and remove it from the module.
2. How to set the correct print head resistance for the thermal transfer printer?
Note the resistance value printed on the new "print head" on the side of the printer's printed circuit board. This value must be entered into the "User Interface" menu structure.
The processor will adjust the voltage level to suit the specific print head resistance level.
Thermal transfer printer print head resistance
Each "print head" has its own "resistance" level, and the voltage level setting required by each print head is different. The label on the print head shows only the resistance rating of that particular print head. In this example, R = 1094
The print head resistance options can be accessed from the print settings menu.
To access the Print Settings menu:
1. Select print settings from the menu screen.
TTO print setting options
2. The print setting menu screen is displayed.
TTO menu screen offset option
3. Use the arrow buttons at the bottom to scroll to the TPH resistance menu, or enter the object number on the numeric keypad.
4. Press the right arrow to select the menu.
TTO menu screen TPH resistance option
5. The TPH resistance menu screen is displayed.
TTO menu screen TPH resistance setting
6. Use the numeric keypad to enter a new value or use the up and down direction buttons to change the value.
7. When finished, press the right button to accept the changed value.