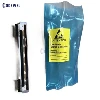
1. Take out the ribbon mandrel and ribbon, and insert the ribbon mandrel into the ribbon shaft center.
2. Push the printer with both hands and turn it up to open the printer cover.
3. Press the print head lift button down and lift the ribbon support frame (at an angle of about 30 °, when you hear a slight "snap" prompt, the ribbon support frame will remain in this position.
4. Pull the manual pull sleeve at the ribbon release shaft slightly outward, and insert the left side of the ribbon release shaft core shaft into the hexagonal boss of the release shaft dial.
5. Align the right side of the carbon ribbon release shaft with the plug of the manual pull shaft sleeve, loosen the manual pull shaft sleeve, and install the carbon ribbon of the release shaft.
6. Take out another ribbon mandrel and ribbon recycling paper shaft, and insert the ribbon mandrel into the ribbon recycling paper shaft as shown in the figure below.
7. Pull the manual pull sleeve at the ribbon recovery shaft gently outward, insert the left side of the ribbon recovery shaft into the hexagonal boss of the recovery shaft dial; align the right side of the ribbon recovery shaft with the manual pull sleeve. Plug, loosen the manual pull sleeve, and the ribbon recovery shaft is installed.
8. Remove the front end of the ribbon from the installed ribbon delivery shaft, bypass the front end of the ribbon from under the print head assembly, and then paste the front end of the ribbon onto the paper shaft of the installed ribbon recovery shaft. .
9. Turn the ribbon to turn the dial to wind the ribbon around the ribbon recovery shaft and tighten the ribbon. At this point, the installation of the ribbon is complete.